Guide for coaches and teachers
How to turn a webinar or online class into clips
You taught for an hour. Twelve people saw it live, a few more watched the replay, and then it sat in a folder. Inside that hour are five or six moments that would do more for your business as short clips than the whole thing ever will as a recording. Here is how to find them and get them out.
The short answer
Look for moments that teach one thing on their own: a clear explanation, a mistake and its fix, a story with a point, a good answer to a question. Cut each to 30 to 90 seconds, frame it for a phone (your face filling the frame, or the whole slide with a blurred fill), ask before you show anyone else from the call, and post one a day for a week. Keep the full method in the course; clip the reasons people need it.
Shorts by Slice turns a long podcast or stream into captioned vertical clips. $14.99 a month. Your first video and first 3 clips are free, no card. After that it's one plan, and you can cancel any time.
Try it free →Which teaching moments make good clips
A webinar is built to be watched in order. A clip is watched by a stranger who arrived three seconds ago and will leave in three more. So the test is simple: would this make sense to someone who saw nothing before it? In most sessions, these pass:
| Moment | What it looks like | Why it works on its own |
|---|---|---|
| The one-minute explanation | “The reason your follow-ups get ignored is…” | A complete idea with a clear payoff. |
| The mistake and the fix | “Most people do X. Do Y instead.” | People love being told what they are getting wrong, kindly. |
| The story | A client, a student, a time it went badly | Stories carry the point without needing the slides. |
| The good question | Someone asks what everyone was thinking | The question sets up the clip for you. Ask the asker first. |
| The before and after | A rewritten email, a fixed chord, a cleaner spreadsheet | You can see the change, even with the sound off. |
What usually fails: the welcome and housekeeping, the bit where you share your screen and scroll, anything that starts with “as I said earlier”, and long answers that wander. If you have to explain the context before the clip makes sense, it is not a clip yet.
The people on the call
Your attendees came to learn, not to appear in your marketing. Two habits keep everyone comfortable. Say at the start that the session is recorded and that you will post short clips of your own parts. Then, when you clip, keep it to you: crop to your own tile, or cut away before someone else speaks.
The best moment is sometimes a question from the audience. Message the person and ask, or record yourself repeating the question and answering it. For a class with students, the same goes double: no student’s face or voice in a public clip without a clear yes. None of this is legal advice; it is just how you keep people coming back to the next session.
And protect your own work. A minute on why most people get something wrong is a great advert for your course. The full method, step by step, belongs in the course.
Framing a call recording for a phone
A webinar recording is wide: 16:9, often with a strip of small video tiles or a slide taking up most of it. Shown whole on a phone, everything shrinks. The pictures below are a podcast recorded as a three-person video call (LinuxGameCast Weekly 430, CC BY-SA 4.0), which is exactly what most webinar recordings look like.
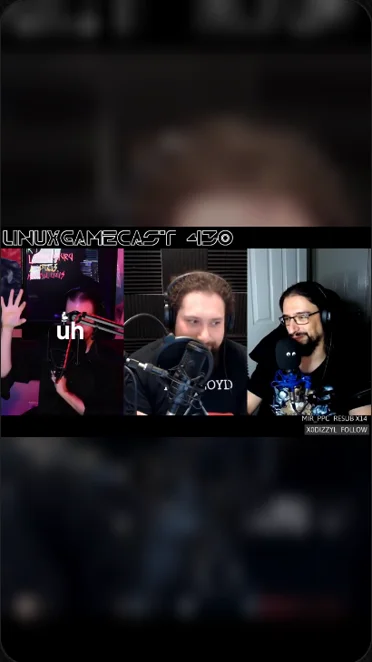

Three ways to frame it, and when to use each:
- Fill the frame on the speaker. For any moment that is you talking. It is the version people stop for.
- Show the whole video, with a blurred fill. For a slide or a diagram that has to be seen in full. Make sure the text on the slide is big enough to read at this size; if it is not, that slide is not a clip.
- Split the screen. Your face in the top half, the slide or screen below. Good for a demo where people need to see both you and what you are showing.
All three are under Frame in the Slice clip editor, and you can change your mind per clip.
Where to post them
Go where your clients already spend time. For most coaches that is LinkedIn plus one of Instagram, YouTube Shorts or TikTok. LinkedIn’s own specs allow any shape from 1:2.4 to 2.4:1, and videos up to 15 minutes (LinkedIn Help: video specs), so square or vertical both work. Reels, Shorts and TikTok want vertical. Every platform’s limits, checked on 2 October 2026, are in our Social Video Specs 2026.
Write the post text like a teacher, not an advertiser: one line on what the clip answers, and where to get the rest. “Why your follow-up emails get ignored (and the one change that fixes it). Full session: link in bio.”
One session, a week of posts
A one-hour session usually gives you five clips worth posting. A week might look like this:
| Day | Post | Why that day |
|---|---|---|
| Monday | The mistake and the fix | A strong opener that is easy to agree with. |
| Tuesday | The one-minute explanation | The core idea, for people who liked Monday’s. |
| Wednesday | The story | Mid-week, something human. |
| Thursday | The good question (with permission) | Shows what your sessions are like from the inside. |
| Friday | The before and after, plus an invite to the next session | Ends the week with a reason to sign up. |
Podcasters run the same routine with episodes; our one episode, a week of posts guide goes into the details of timing and post text.
Webinar to clips in Slice, step by step
- Record the session with your own camera on
Use speaker view, not gallery, if your platform lets you choose, so the recording is mostly you. Say at the start that you will make short clips from your parts of the session.
- Upload the recording to Slice
MP4, MOV or WebM, up to 3 hours. A long upload asks what you want: choose “Find the best clips” rather than “Caption the whole video”.
- Point it at a topic if you want one
Leave it to find the best moments, or type a topic into “Find clips about this” (pricing objections, the second framework, the question about burnout) and it looks for clips that match.
- Fix the framing for a phone
For a talking moment, fill the frame on whoever is speaking. For a slide, show the whole video with a blurred fill so the slide stays readable, or split the screen with your face above the slide.
- Tick a week of clips and export them together
Pick five, export them in one go, and schedule one a day. Keep the full recording for your course or replay page.
Get the Slice Weekly
One free email every Friday: tools for creators and the best advice we found from people who make things.
Questions
What makes a good clip from a webinar?
One idea that makes sense without the rest of the session: a short explanation, a common mistake and its fix, a story with a point, or a clear answer to a question. Thirty to ninety seconds is plenty.
Do I need permission to post clips that show attendees?
Ask. Tell people at the start that you will clip your own parts, and crop or cut anyone who did not agree. If a question from the audience is the best moment, ask the person, or repeat the question yourself on camera. This is good practice, not legal advice.
Won’t clips give away my paid course?
Clip the why and the what, keep the how. A minute on why most people get something wrong sells the course; the full method stays in it.
How do I make slides readable in a vertical clip?
Show the whole video with a blurred fill rather than cropping into it, keep slide text large, or split the screen with your face on top and the slide below. Cropping a 16:9 slide to 9:16 cuts most of it off.
Where should coaches post webinar clips?
Wherever your clients already are. LinkedIn accepts anything from 1:2.4 to 2.4:1, so square or vertical both work there; Reels, Shorts and TikTok want vertical.